Introduction 00:00
As you’ve probably understood by now, we are going to use React. Maybe you already know React, maybe you don’t, or maybe you just need a quick refresh.
Anyway, since this course is beginner-friendly, we are going to learn React and while doing so, we are going to put Three.js and R3F aside.
Don’t expect this lesson to be creative and good-looking. Although this lesson is quite practical, the following lessons will challenge your creativity.
By the end of this lesson, you should know everything you need to for what’s coming, but also a bit more so that you truly understand React and how to use it.
If you already feel comfortable with React, you can skip ahead to the next lesson.
Do not feel overwhelmed by the amount of information you’ll learn. It’s a lot, but it’s perfectly normal not to understand and remember everything. We are going to implement what we’ve learned in the next few lessons.
Setup 01:41
In order to really understand React, we are going to start the project in multiple different ways:
- With NPX and Create React App. This technique will create a default React application with some features already running.
- From scratch to really understand what is happening.
- With Vite, so that we’re sticking with a good build tool.
With NPX and Create React App
One of the most common ways to create a React application, is with npx.
npx is installed with Node.js and NPM. It allows us to run NPM packages without having to create a project and install the dependencies as we did with npm.
The idea here is that we are going to run an NPM package that will create a default React project. The NPM package is named create-react-app (https://www.npmjs.com/package/create-react-app).
We are going to demonstrate it here for the sake of learning, but we are not going to use it. Feel free to simply read the following part or to do it out of curiosity.
Create a folder and name it the way you want. Let’s say XX-first-react-application (with XX being the number of this lesson).
Go inside the folder using the terminal and run npx create-react-app . (the . indicates that we want the project to be set in the current folder). Running this command might get an error because of an incompatibility with React version 19. If you get the error, move to the next session where we learn a different technique.
If you are being asked to install a dependency, type y and press Enter.
Wait for a little while and you’ll get a small, ready-to-use React project in the folder. You can start it with npm run start.
This is a great and popular solution, but there are a lot of files and features that we don’t really need.
From scratch
Let’s see how we can create a React app without using NPX now.
Create the base project
Empty the XX-first-react-application (with XX being the number of this lesson) folder and open your terminal in that folder (if you haven’t done so already).
We are going to create a project with npm init -y.
Creating a project requires nothing more than setting a package.json file that forms the basis of every standard project.
Adding the -y instructs the project to use all default values. If you don’t add -y, the terminal will prompt you with a bunch of questions, such as the name of the project, the version, the author, etc..
Versions
React is still under development, which is great! A huge community is working on it and it keeps evolving. But the downside of this is that learning resources get outdated at some point and that’s also the case for many of the libraries we are going to use next.
That’s the reason why, starting from now on, we are going to use very specific versions of the dependencies. I will try to keep those dependencies up to date.
Don’t be surprised if you see some vulnerability warnings when installing dependencies. Most of the time, they are harmless, especially since we are creating small simple experiments that are not subject to hacking.
Still, for future projects, you should update the dependencies to the latest versions and make sure that everything is working properly.
To update a dependency to its latest version, run npm install theDependency@latest (This command line is an example; don’t execute it).
And if you have issues, don’t hesitate to ask for help on the Three.js Journey Discord server.
Dependencies
From your terminal in the project folder, run npm install react@18 react-dom@18.2 react-scripts@5.0 to install dependencies.
Here’s what each one will do:
reactis the core of React.react-domis a DOM renderer that will convert what we write in React to DOM elements for the web.react-scriptscontains common scripts that we need like running the dev server or building for production.react-scriptshas actually been built forcreate-react-app.
Scripts
We need to add two scripts to our project. One will start the local dev server so that we can work on the project from our computer. The other one will build for production.
Add the two following scripts in the "scripts" property in package.json (you can remove the "test" script):
{
  // ...
  "scripts": {
    "dev": "react-scripts start",
    "build": "react-scripts build"
  },
  // ...
}
In case you didn’t know, those scripts can be run by executing npm run theNameOfTheScript from the terminal. You can name them any way you want and they have access to dependencies installed in the project (in our case react-scripts).
(Note that React users are more used to start than dev, but I’d prefer to stick to the workflow of the previous lessons).
Let’s create our first React application.
public folder
Create a /public/ folder.
The /public/ folder will contain public files that we want to be available just the way they are (like our /static/ folder in the previous lessons).
In /public/, create an index.html file.
If you are using VSCode, write ! (or html:5) and then press TAB to create a basic HTML page. Otherwise, use whatever you want to create this basic HTML code:
<!DOCTYPE html>
<html lang="en">
<head>
    <meta charset="UTF-8">
    <meta http-equiv="X-UA-Compatible" content="IE=edge">
    <meta name="viewport" content="width=device-width, initial-scale=1.0">
    <title>Document</title>
</head>
<body>

</body>
</html>
Change <title> to XX - First React Application (with XX being the number of this lesson):
<title>XX - First React Application</title>Create a <div> in the <body> and give it and ID of root:
<div id="root"></div>This <div> will contain our React application and we are going to target it using its ID.
src folder
Create a /src/ folder.
The /src/ folder will contain source files that will be processed before getting output as classic web-friendly content; typically, our JavaScript.
In /src/ create an index.js file.
In this file, import createRoot from react-dom/client:
import { createRoot } from 'react-dom/client'createRoot, as its name suggests, will create the root of a ReactDOM application and we can pass it the DOM Element that will be replaced by this root (the <div> with the root ID in our case):
const root = createRoot(document.querySelector('#root'))Our React application is almost ready. We now need to render it with the render() method:
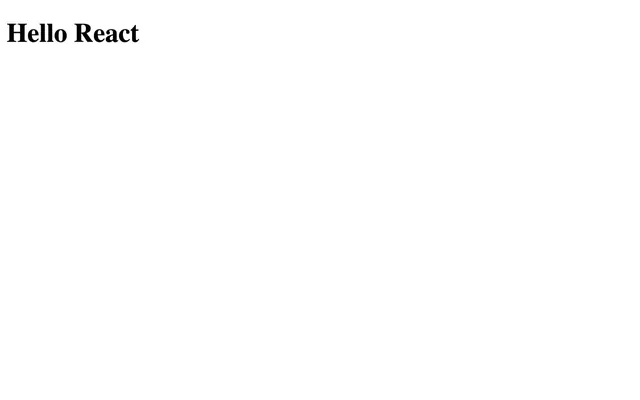
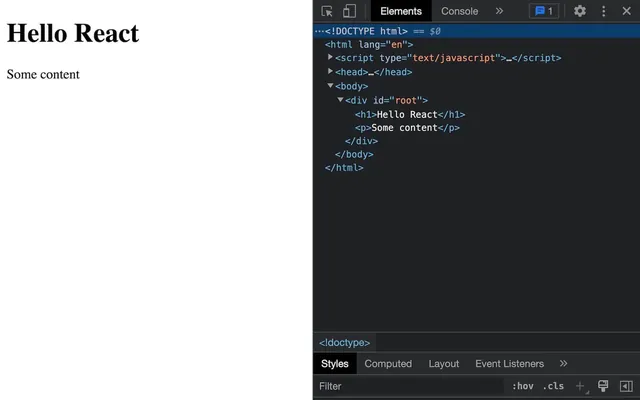
root.render(
    <h1>Hello React</h1>
)
Don’t be surprised to see tags like this in the JS; we’ll be discussing those a little later.
Start it
Our ultra-basic React application is ready and I hope you are too. It’s time to start the dev server.
In the terminal (in the folder), run npm run dev.
The first time we start it, the script might ask us for the targeted browsers. The code we are writing will be transpilled in order to maximise compatibility and React wants to know down to which browsers and browser versions we want our application to work with.
Press Y to use default browsers and the script will save that default value in package.json so that it doesn’t ask us every time we start coding.
The application should start and the website should open in your default browser:

The screenshots in this lesson are going to look a bit empty and useless but they will help you understand what should appear on your screen.
Also note that the viewport is zoomed in so that things are easier to see, it might look smaller on your screen.
If something went wrong and you got an error, don’t bother trying to fix it. In the end, we are not going to use that technique anyway.
We could use this “from scratch” version. The following lessons have actually been recorded using it, but because we have been using Vite in the previous lessons and because Vite integrates very well with React, we are now going to use the Vite version.
Delete the XX-first-react-application (with XX being the number of this lesson) folder or keep it somewhere else.
With Vite
We are going to discover how to set up a brand-new React Application using Create Vite.
Note that the lesson has been written and recorded with Vite 4.0.4. You might notice slight differences when doing it yourself.
Create Vite
Following Vite documentation, we can create a project by running npm create vite@latest and it’s actually that simple, even when we want to set up a React application.
But let’s talk a little about npm create and try to understand what is really happening.
npm create is an alias for npm init (documentation). Calling npm create vite@latest will be the equivalent of calling npm init vite@latest.
npm init will then add create- at the beginning of the dependency, meaning that we are actually using the create-vite package (NPM page, GitHub).
This create-vite package's purpose is to prompt a few questions in the terminal and then create the appropriate project. Let’s try it.
From the terminal in the folder containing all your lessons, run npm create vite@latest (you should have removed or moved the XX-first-react-application).
If it’s the first time you use create-vite, the terminal will ask you if you want to download it:

Press y and Enter.
Then, choose a Project name that will be used for the folder name (among other things):
![]()
You can write XX-first-react-application (with XX being the number of this lesson) or whatever name suits you:

Then, you’ll have to choose a framework:
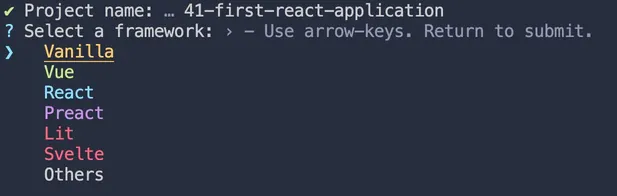
Use the arrows to navigate, choose React and press Enter.
Then, you’ll have to choose a variant:
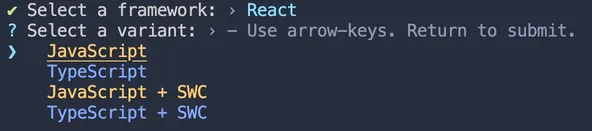
I won’t explain those variants since they might change in the future. In addition, we want to use the simplest one. Use the arrows to navigate, choose Javascript, and press Enter.
The project is now ready and the terminal should display the commands that you should run to install the dependencies and start the project:
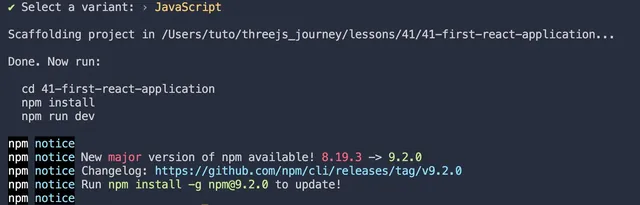
Open the newly created folder in your terminal, run npm install and run npm run dev:
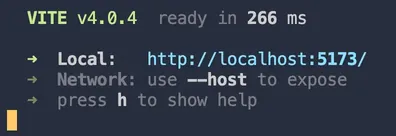
Open the displayed URL in your browser and you should see the React application:

The template is quite simple with some assets, a button to update a counter, and some information to help you get started.
It’s a great way to set up a React project, but we are going to use a slightly modified version.
Using the starter
A starter is provided with the course and it’s a mix between the template we have been using in the previous lesson and the React project created with Vite.
Download the starter, open it in the terminal, run npm install and npm run dev:
You should get the same basic React application as we had earlier with Hello React written in the page.
One important thing to note is that the main JavaScript file is named index.jsx. Using the .jsx extension is considered as a good practice, yet, most of the following lessons have been recorded using a mix of .js and .jsx.
Do not worry, the Vite configuration supports both .js and .jsx and you can decide which one you prefer.
We’ve seen multiple ways to set up a React project and you might think that it’s a complex task, but it’s not. We simply took our time to discover various solutions in order to understand what is going on.
If you want to create a React project, you can set one up in a matter of seconds using Create Vite.
JSX 40:25
Let’s talk a little about what we wrote in the render().
We wrote an <h1> and you might think that this is basic HTML, but it’s not. This is JSX.
JSX is a tag-based language and it’s very close to HTML. However, it has a lot more in it.
Features
Let’s review some features of JSX, what we can do and what we can’t.
Not indent-meaning
We can indent however we want without any consequence. We can use 2 spaces, 4 spaces or even tabs.
It’s the opportunity to keep the code clean and understandable.
Must contain one element
The render can only contain one element. In our case, it’s an <h1>, but it can be something else:
root.render(
    <div>Hello React</div>
)
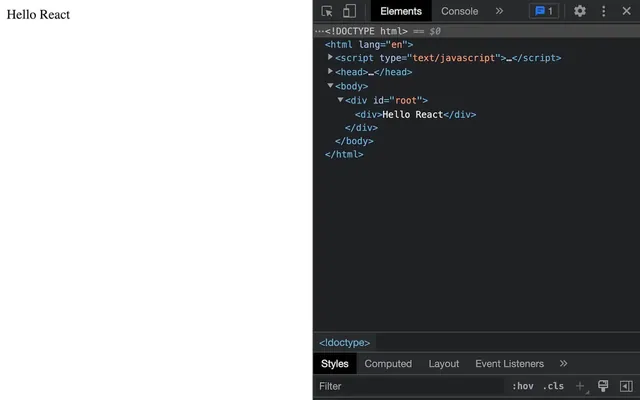
This element can have as many children as we want:
root.render(
    <div>
        <h1>Hello React</h1>
        <p>Some content</p>
    </div>
)
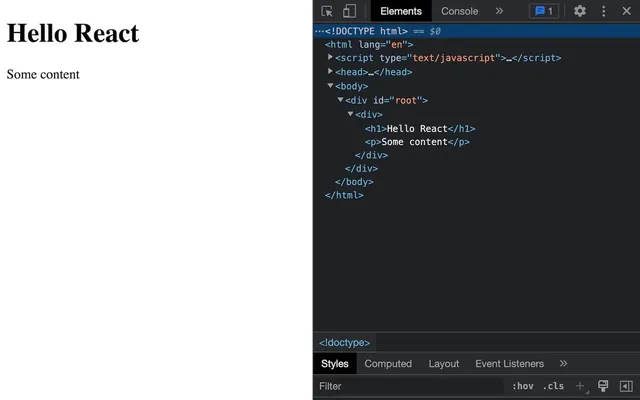
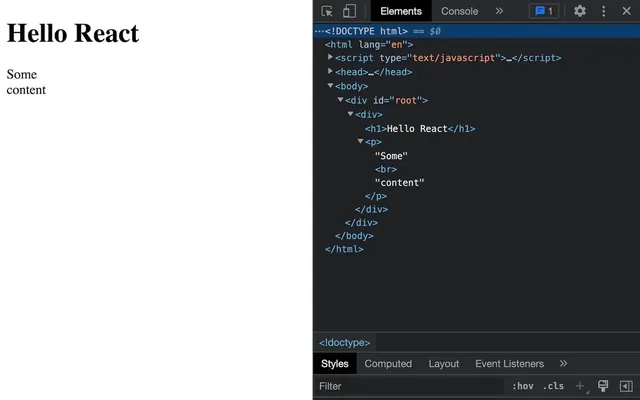
Those children can have even more children:
root.render(
    <div>
        <h1>Hello React</h1>
        <p><strong>Some</strong> <em>content</em></p>
    </div>
)
But if we really want to have multiple elements without having one main parent, we can use what we call a fragment (<>…</>):
root.render(
    <>
        <h1>Hello React</h1>
        <p>Some content</p>
    </>
)
A fragment is just a container that won’t be rendered as a DOM Element.
No auto closing
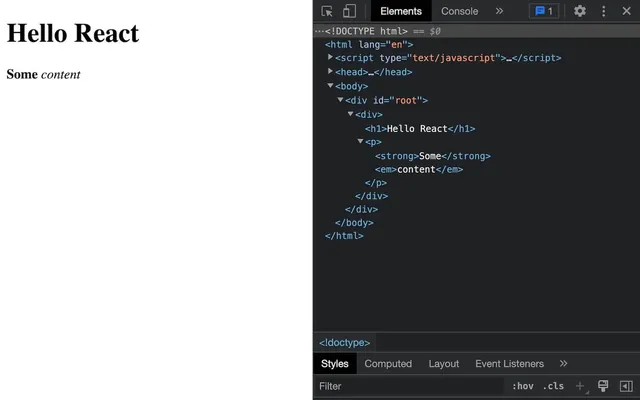
We can’t write <br> or <img> without closing them.
We have to add the closing tag or add the / at the end (before the >):
root.render(
<div>
<h1>Hello React</h1>
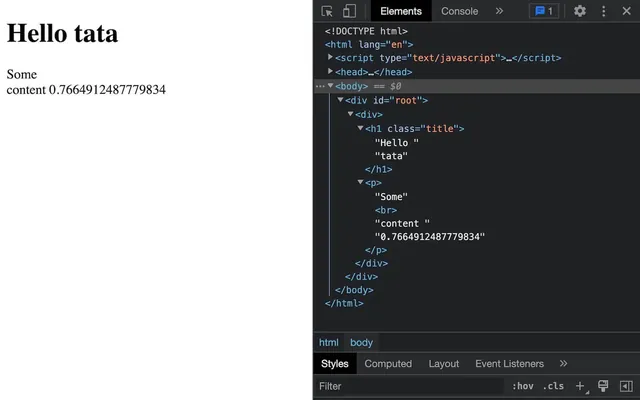
<p>Some<br />content</p>
</div>
)
Reserved keywords
Some keywords like class or for are reserved. This means that we can’t have a tag or an attribute with similar names. Doing so will potentially trigger bugs at some point.
But what if we want to add a class attribute to our elements?
Simple, they are replaced:
classbecomesclassNameforbecomeshtmlFor
root.render(
    <div>
        <h1 className="title">Hello React</h1>

        <p>Some<br />content</p>

        <label htmlFor="name">Name</label>
        <input id="name" type="checkbox" />
    </div>
)
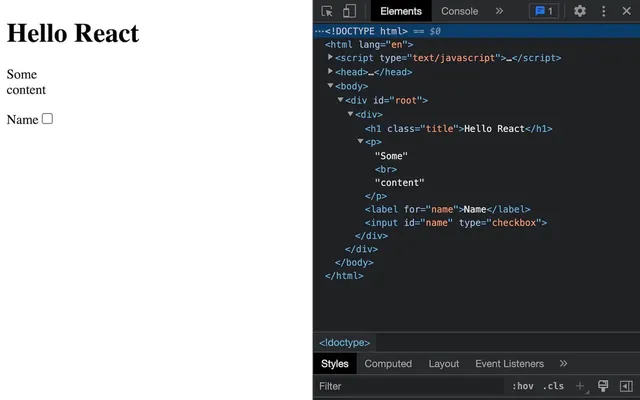
There are many other reserved keywords, but class and for are the most commonly used ones.
Single quotes and double quotes
Attributes can be written with single quotes:
root.render(
    <div>
        <h1 className='title'>Hello React</h1>

        <p>Some<br />content</p>

        <label htmlFor='name'>Name</label>
        <input id='name' type='checkbox' />
    </div>
)
It’s up to your preferences, but you should stick to your choice throughout the whole project. Consistency is key.
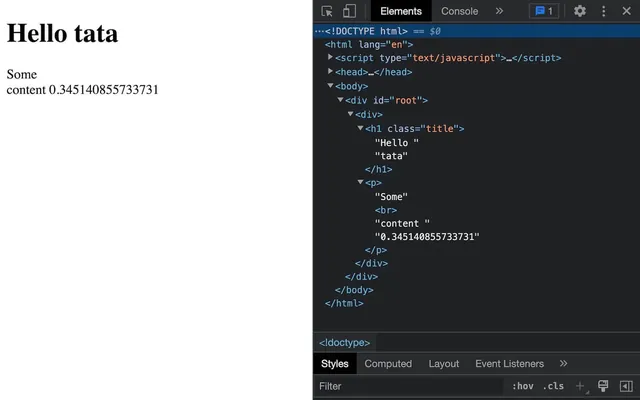
Injection
We can inject variables and execute JavaScript inside {...}:
// ...

const toto = 'tata'

root.render(
    <div>
        <h1 className="title">Hello { toto }</h1>
        <p>Some<br />content { Math.random() }</p>
    </div>
)
But we can’t write any JavaScript between { and }.
Here are a few examples of what we can do:
{ 1 + 1 }: Do math operations{ Date.now() }: Call method from JavaScript objects that returns something{ myFunction() }: Call custom method that returns something{ myFunction }: Send a function (that function won’t be called, we are just sending it){ () => {} }: Send a function that we create on the fly{ myArray.map(…) }: Call methods that go through an array and return things{ 'random number :' + Math.random() }: Concatenate{ `random number : ${Math.random()}` }: Concatenate using backticks{ <h1>A title<h2> }: Return tags
And here are a few things we can’t do:
{ if(...) }{ for(...) }{ while(...) }
Those are just examples so that you get the idea. We are going to put that into practice anyway.
Comments
Commenting is a bit tricky because we have to open and close the {...} and then create a JS block comment /* ... */:
root.render(
    <div>
        {/* Some comment */}
        <h1 className="title">Hello { toto }</h1>
        <p>Some<br />content { Math.random() }</p>
    </div>
)
But most code editors support JSX and your comment shortcut should do it for you.
Style 01:01:15
That’s cool, we can create tags, inject variables and JavaScript, but it doesn’t look good.
How can we add some style?
There are multiple ways of doing so.
With the attribute
We can write it directly in the style attribute.
First, we add the style attribute, but instead of using "", we write {} after the = (this code will break, we need to add something in it):
<h1 style={ }>Hello React</h1>This is the way of injecting JS inside an attribute.
In the case of the style attribute, we need to send an object:
<h1 style={ { } }>Hello React</h1>Adding that many {} might feel weird, but it makes sense and you’ll get used to this syntax.
We can now add CSS properties to the object and their corresponding values as string:
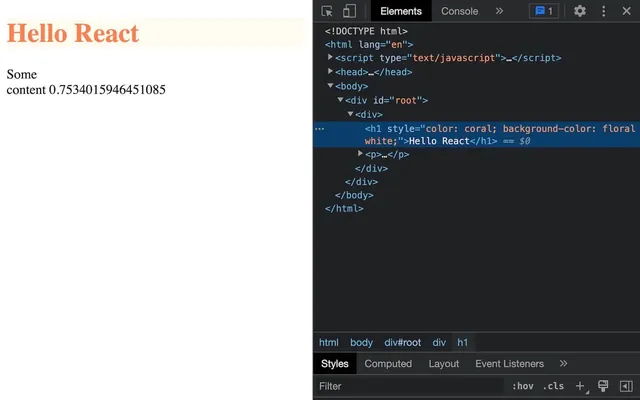
<h1 style={ { color: 'coral', backgroundColor: 'floralwhite' } }>Hello React</h1>
Like in vanilla JS, we have to write properties in camelCase.
Note that this is where developers’ coding conventions come in. I like adding a lot of spaces everywhere, but having JS inside a JSX, inside functions, inside other stuff might get messy and some developers prefer to have their code as tight as possible:
<h1 style={{ color: 'coral', backgroundColor: 'floralwhite' }}>Hello React</h1>Or even:
<h1 style={{color:'coral',backgroundColor:'floralwhite'}}>Hello React</h1>It’s up to you to find the most suitable way of writing code. My only recommendation is to stick to one way of coding throughout the whole project.
Applying the style directly onto the element is particularly useful if we have properties that change according to the JS, but it’s not very convenient otherwise.
With a CSS file
A more traditional way of adding style is by importing a CSS file and targeting elements with their tag or by adding a class to them.
In /src/, create a style.css file with the following content:
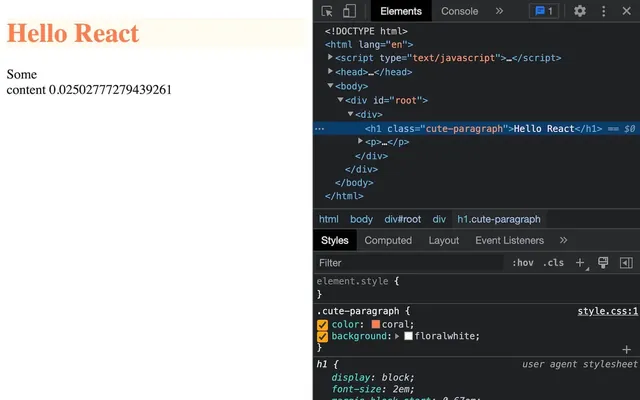
.cute-paragraph
{
    color: coral;
    background: floralwhite;
}
Add the class with className to the paragraph instead of the style attribute (remember that we can’t use the class keyword):
<h1 className="cute-paragraph">Hello React</h1>Import the style at the beginning of index.jsx:
import './style.css'
Using a CSS framework
You can also use CSS frameworks. Some of those integrate really well with React like Tailwind, but we are not going to cover that here, especially because we won’t need to write a lot of styling in the following lessons.
A bit of everything
You can actually use all the techniques we mentioned earlier. You can use a CSS framework to do most of the heavy lifting, add a custom CSS file for specific tweaks and use the style attribute for injected values.
It’s up to you and it depends on what fits best in the project.
Create the App component 01:12:29
React relies a lot on what we call components.
We don’t want to write a huge application inside that render() method call. Instead, we want to separate our application into multiple small parts in order to separate everything but also re-use some of those parts multiple times.
The first and main component we usually create is an App component. It’ll be kind of the main container.
In /src/, create an App.jsx file.
In that file, create an App function and export it by default:
export default function App()
{

}
If you are unfamiliar with exporting (and modules in general), check the beginning of the Code structuring for bigger projects lesson.
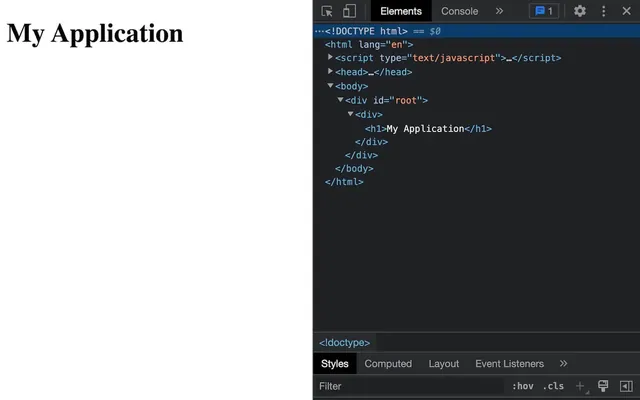
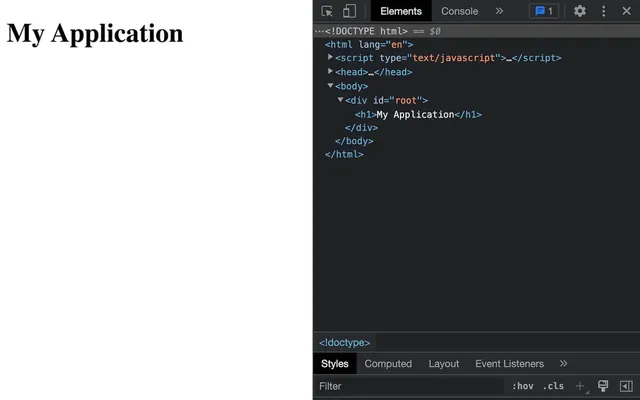
In that function, return the following JSX:
export default function App()
{
    return <h1>My Application</h1>
}
In index.jsx, import it:
import App from './App.jsx'We can now add it in our render() as if it were a tag:
root.render(
    <div>
        <App></App>
    </div>
)
There is almost no trick here. Initially, we wrote <h1>...</h1> directly, and now, we wrote a component that will return the same <h1>...</h1>
And that’s it, we created our first component.
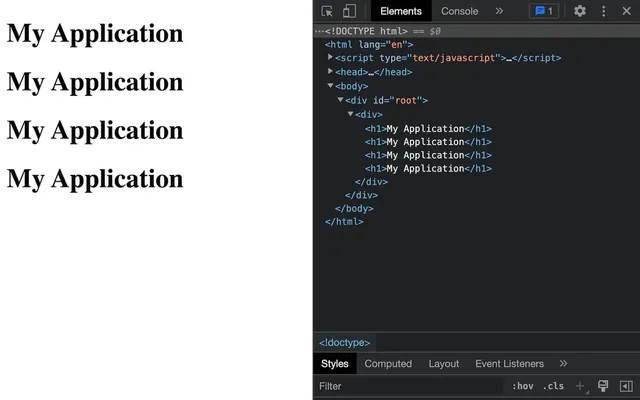
Components come in handy, not only to separate code, but also to re-use them:
root.render(
    <div>
        <App></App>
        <App></App>
        <App></App>
        <App></App>
    </div>
)
If there is nothing in it, we can auto-close it:
root.render(
    <div>
        <App />
    </div>
)
If you try to put content between the opening and closing tags, nothing will happen (for now):
root.render(
    <div>
        <App>Where am I?</App>
    </div>
)
We can also get rid of the parent <div>, as long as there is only one top component:
root.render(
    <App />
)
We imported the App class ourselves, but we can also rely on the VSCode (or other software) auto-import by writing the component right inside the JSX:
root.render(
    <Ap // At this point, the software should propose you to import the component
)
When auto importing, VSCode will not always write the .jsx extension because JavaScript is considered as the default.
It’s up to you to add it or not.
Logic code
Back to App.jsx, we can still write JS inside that function right before the return:
export default function App()
{
    console.log('JS is still working')

    return <h1>My Application</h1>
}
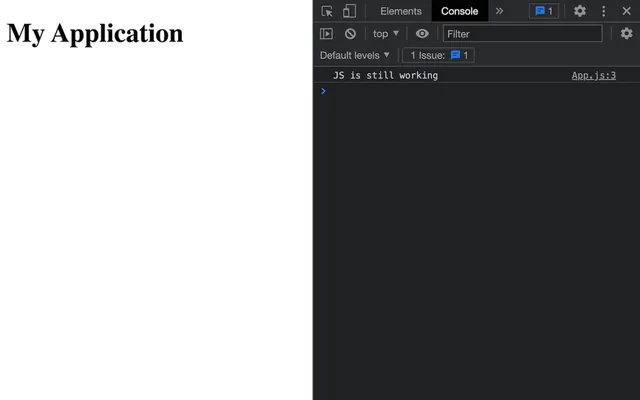
This is important because this is where we are going to put most of the logic of the component. We can fetch data, create some arrays, calculate things, etc.
Hot module reload
Maybe you have noticed that the logs are staying in the console.
Let’s test that by replacing what you wrote in the console.log:
export default function App()
{
    console.log('And this is working too')

    return <h1>My Application</h1>
}
And again:
export default function App()
{
    console.log('What is happening?')

    return <h1>My Application</h1>
}
Now check the console:
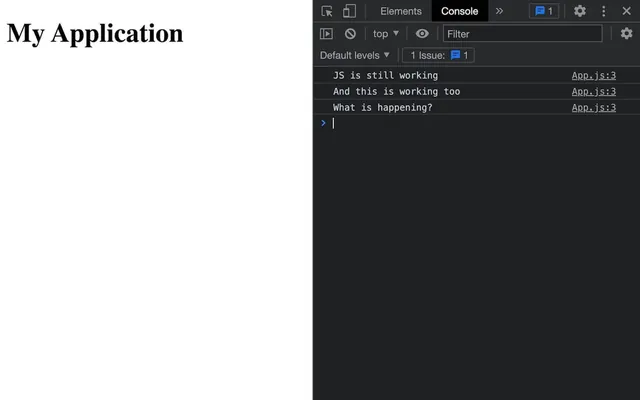
As you can see, the logs are persistent and this is not due to the Developer Tools settings. If you reload the page, you should be able to get rid of the logs.
The real reason is that React is using what we call Hot Module Reloading (HMR) in order to re-instantiate only the parts that have changed without reloading the whole page.
This is great, especially with complex applications that take time to instantiate or with long animations that you need to go through in order to see the content you are working on.
But sometimes it bugs a little, especially with complex environments like Three.js. You can still rely on it, but if you feel that something is odd, maybe give your app a little reload. Or as we say in French, “dans le doute reboot”.
Render
Another important point to understand is that the whole function will be called every time React renders our component. We will cover this later when React decides to render the component, but it happens mostly when data changes.
It doesn’t mean that all DOM elements corresponding to the JSX will be re-rendered. React will keep the previous structure in memory and only re-render what needs to be re-rendered by using the Virtual DOM (more about that later).
Clicker component 01:27:31
We created the main component called App. Now, let’s create another one.
We are going to create a Clicker component that contains a button and a number that increments when we click on the button.
It’s not very useful, but it’s a good opportunity to learn many of the React features.
Now would be a good time to practice on your own. Try to create a Clicker component and implement it in the App.
Let’s do it together.
Create the component
In /src/, create a Clicker.jsx file.
Create a Clicker function that return a <div> and export it by default:
export default function Clicker()
{
    return <div>
        Clicker
    </div>
}
In App.jsx, import Clicker and use it to replace the previous content:
import Clicker from './Clicker.jsx'

export default function App()
{
    return <>
        <Clicker />
    </>
}
Update the Clicker to show a <button> and the click count:
export default function Clicker()
{
    return <div>
        <div>Clicks count: 0</div>
        <button>Click me</button>
    </div>
}
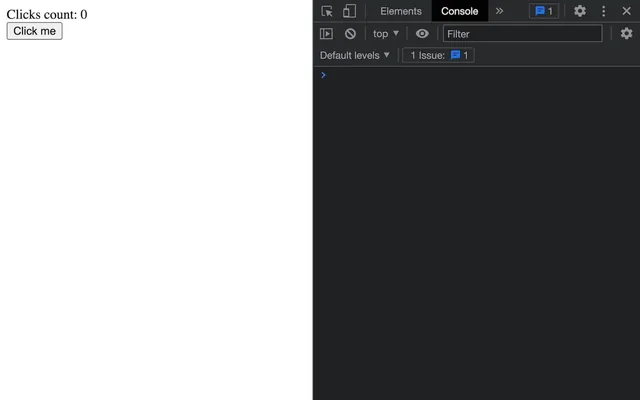
Our Clicker component is ready, but clicking on the button doesn’t do anything yet.
Reactive data with hooks and events 01:32:22
We are going to create our first reactive data with a simple count variable.
For the sake of learning, we are going to do it the wrong way first and then fix it.
First reactive data
Create a count variable in the Clicker function, set it to 0 and display it in the JSX:
export default function Clicker()
{
    let count = 0

    return <div>
        <div>Clicks count: { count }</div>
        <button>Click me</button>
    </div>
}
We get the same result, but we are now injecting a variable.
We now want to know when the user clicks on the button in order to increment count.
We could try with querySelector followed by an addEventListener but it would be a mess, especially considering that the Clicker function is going to be called every time data changes.
It also wouldn’t be the React way.
The solution is actually very simple. We can add an onClick attribute to the <button> and pass it a function.
First, create a buttonClick function in Clicker:
export default function Clicker()
{
    let count = 0

    const buttonClick = () =>
    {
        console.log('Button has been clicked')
    }

    // ...
}
Then, add the onClick attribute on <button> and send it the function:
export default function Clicker()
{
    // ...

    return <div>
        <div>Clicks count: { count }</div>
        <button onClick={ buttonClick }>Click me</button>
    </div>
}
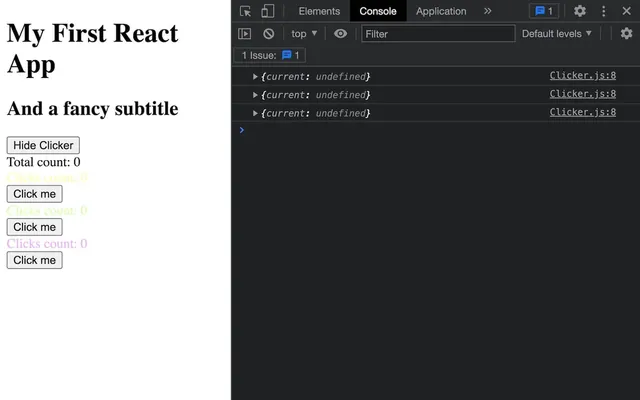
Now, when we click on the button, our buttonClick function will be called as you can see in the console.
We can also pass the function directly like this (don’t do it):
export default function Clicker()
{
    let count = 0

    return <div>
        <div>Clicks count: { count }</div>
        <button onClick={ () => { console.log('Button has been clicked') } }>Click me</button>
    </div>
}
But let’s stick to a separate function for the sake of readability.
We used onClick, but as you can guess, there are many different events supported and you can find them here https://reactjs.org/docs/events.html#mouse-events
Now let’s make a mistake and increment count in the function:
export default function Clicker()
{
    let count = 0

    const buttonClick = () =>
    {
        count++
    }

    // ...
}
Although we are incrementing count, nothing is happening in the app and the visible value stays at 0.
It’s because our Clicker function isn’t being called again.
React doesn’t know that something has changed and that the component needs to be re-rendered.
To fix that, we need to handle variables that change with the “React” way and we are going to use a state.
The useState hook
useState is what we call a “hook”. It’s a function that we call inside the component to do specific tasks related to that component.
There are a bunch of hooks that do different things.
Here, the task of useState is to provide us a variable and a function. When we want to change the variable, instead of re-assigning it, we will be using the function.
The function won’t just change the variable, it’ll also alert React that the component needs to be re-rendered and we should see the new value appear magically.
Let’s try it.
In Clicker, import useState from react:
import { useState } from 'react'At the beginning of the Clicker function, call useState with the initial value we want for the count (0 in our case) and log it to see what’s inside (don’t remove count yet):
import { useState } from 'react'

export default function Clicker()
{
    const countState = useState(0)
    console.log(countState)

    let count = 0

    // ...
}

Weirdly, we get an array with the initial value (0) and a function (the one that we need to call to update the value).
Assign the first value of the countState array to a count variable (remove the original count variable to prevent conflicts) and assign the second value to a setCount variable:
export default function Clicker()
{
    const countState = useState(0)
    const count = countState[0]
    const setCount = countState[1]

    // ...
}
Now, in the buttonClick function, instead of incrementing the count variable directly, use the setCount function:
import { useState } from 'react'

export default function Clicker()
{
    const countState = useState(0)
    const count = countState[0]
    const setCount = countState[1]

    const buttonClick = () =>
    {
        setCount(count + 1)
    }

    // ...
}
And that’s it! Your UI will update itself automatically when you click on the <button>. The whole Clicker function will be called, but React will only update what has changed.
Note that writing count + 1 doesn’t update the count variable directly. We are only sending the result of the operation to setCount without altering the original variable.
By the way, there is another way of calling setCount (and any “setter” function) and it’s by sending a function to it (don’t save yet):
setCount(() => {})The function will be called and the current state value will be sent as an argument:
setCount((value) => {})We can then use that value to return whatever we want (value + 1 in our case):
setCount((value) => { return value + 1 })And since we are using an arrow function with a return as the only instruction, we can write it like this:
setCount(value => value + 1)This will result in the exact same behaviour, then why bother?
This technique makes sure that we are using the latest state value which is useless in our case, but very important if you do asynchronous instructions. As an example, if you try to do it after a few seconds using a setTimeout, the state might have changed when setCount will be called.
But this is a rare case scenario.
Let’s get back to the previous setCount call we had:
setCount(count + 1)Having to create 3 variables (countState, count, setCount) when using useState is a bit long, but there is a better way that actually explains why it’s an array.
We can destructure the array into variables:
export default function Clicker()
{
    const [ count, setCount ] = useState(0)

    const buttonClick = () =>
    {
        setCount(count + 1)
    }

    // ...
}
This will result in both the count and the setCount variables containing the same thing we had earlier.
Destructuring is used a lot in React and it also works with objects as we will see later.
Save in localStorage with the useEffect hook
Next, we would like to save the value so that, when we close the tab and re-open it, we keep the value.
In JavaScript, we have access to an API named localStorage that lets us save data locally as key and value.
We want to take that value from localStorage when the component is rendered for the first time and update the value in localStorage when it changes.
We need a way to do instructions when the component is rendered for the first time and a way to do instructions when the component renders again. Both can be done with the useEffect hook.
First, in Clicker.jsx, import useEffect from react:
import { useEffect, useState } from 'react'Call it right after the useState and send it a function with a console.log() inside:
export default function Clicker()
{
    const [ count, setCount ] = useState(0)

    useEffect(() =>
    {
        console.log('hello')
    })

    // ...
}
The log will appear once when the component is rendered for the first time, but also after each change (when we click on the button).
To better control when useEffect is being called, we can pass it an array of dependencies as the second argument.
If that dependencies array is empty, our function will be called only during the first render:
useEffect(() =>
{
    console.log('First render')
}, [])
But we can also specify the variables that we want to observe:
useEffect(() =>
{
    console.log('Count changed')
}, [ count ])
Here, the function will be called only when count changes.
This gives us the same result as calling useEffect without any dependency because the only variable we have is the count, but it can be interesting if you start having multiple variables in the same component.
Save in localStorage
Let’s keep it like this so that we take care of saving in localStorage whenever the count changes.
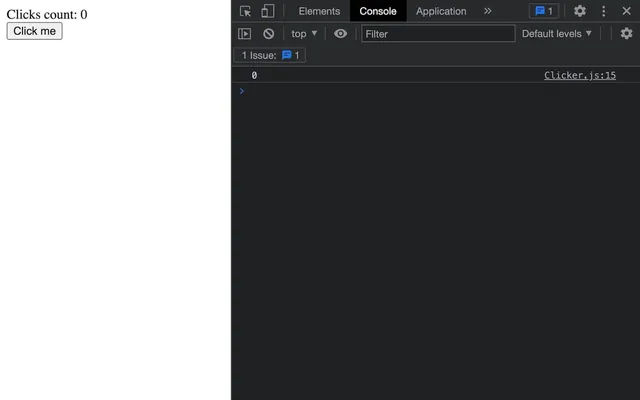
In useEffect, we are going to save count in localStorage with the setItem method.
setItem expects a key and the value:
useEffect(() =>
{
    localStorage.setItem('count', count)
}, [ count ])
That’s all we need to do to save count in localStorage whenever the value changes.
We are not going to go into details about the localStorage API, but it’s quite simple and you can learn more here https://developer.mozilla.org/en-US/docs/Web/API/Window/localStorage.
In the Developer Tools, you can check the value in the Application tab.
Get from localStorage
Now that the data is saved, we want to retrieve it when the component renders for the first time (when we open the page).
To do that, we use another useEffect, but with an empty array as dependencies.
Call again useEffect (before the first one) with an empty array as the second argument:
export default function Clicker()
{
    // ...

    useEffect(() =>
    {
        console.log('First render')
    }, [])

    useEffect(() =>
    {
        // ...
    }, [ count ])

    // ...
}
Remember that setting an empty array will entail that the function will only be called on the first render of the component only.
Here, we can retrieve the variable from localStorage with the getItem() method:
useEffect(() =>
{
    const savedCount = localStorage.getItem('count')
    console.log(savedCount)
}, [])
Unfortunately, we can’t use that variable as it is and we need to do some refining.
First, localStorage only saves and returns string data. If you send something other than a string, it’ll be converted automatically.
We can use parseInt() to convert it to a number:
useEffect(() =>
{
    const savedCount = parseInt(localStorage.getItem('count'))
    console.log(savedCount)
}, [])

Secondly, if the user opens the app for the first time, there will be no data in localStorage and savedCount will result in NaN (not a number) because we are doing a parseInt() on null.
You can test it by removing the localStorage data in the Developer Tools:
We could fix that by inverting the two useEffect order, but that would be silly and fragile.
Instead, we are going to test the variable with nullish coalescing operator (??) inside the parseInt() and return 0 if it’s not right:
useEffect(() =>
    {
        const savedCount = parseInt(localStorage.getItem('count') ?? 0)
        console.log(savedCount)
    }, [])
The nullish coalescing operator will return 0 if localStorage.getItem('count') is null or undefined.
Now, we can update our state with setCount:
useEffect(() =>
    {
        const savedCount = parseInt(localStorage.getItem('count') ?? 0)
        setCount(savedCount)
    }, [])
Click on the button a few times, reload the page and you’ll notice that the value has been saved and restored properly.
Next, we are going to see how we can empty the localStorage when the component is being destroyed (or “disposed”). And to do so, we need a way to destroy that component.
But first, we need to do some fixing.
Fixing the renders
Using useEffect with an empty array of dependencies to do some instructions on the first draw is ok, but there is a small issue with that.
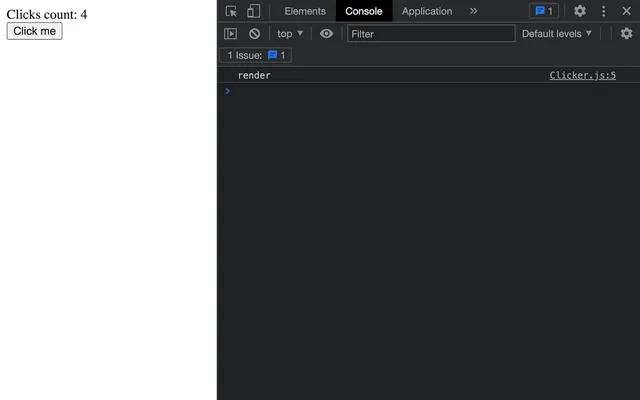
To test it, add a console.log() anywhere in the component:
export default function Clicker()
{
    console.log('render')

    // ...
}
Then, click on the button a few times to ensure you have a value saved in localStorage, and finally, reload the page:
It seems that we are getting two renders. And the reason is quite logical. There is a first render with the initial state of count to 0 and then, after that first render, we call setCount to put the value from the localStorage in it. Data has changed, so the component must be re-render.
While it’s no big deal, it’s good practice to minimise renders, which is why we are going to fix it.
And the fix is actually quite simple. Instead of setting the initial value of count to 0, we retrieve it from the localStorage with the exact same instruction we wrote before:
export default function Clicker()
{
    console.log('render')
    const [ count, setCount ] = useState(parseInt(localStorage.getItem('count') ?? 0))

    // ...
}
We can also remove what we had in the useEffect but keep the useEffect call since it’s going to be useful later:
export default function Clicker()
{
    console.log('render')
    const [ count, setCount ] = useState(parseInt(localStorage.getItem('count') ?? 0))

    useEffect(() =>
    {
    }, [])
}
And as you can see in the console, we get only one render.
Remove the console.log('render').
We could have set it like this from the beginning, but I wanted you to see different usages of useEffect first.
Make the clicker conditional
In the App component, we are going to create a button that will toggle the whole Clicker component.
First, we need a variable that indicates whether or not the <Clicker> is visible and we are going to use useState because it’s a data that is supposed to change and we want to re-render the component according to that data.
In App.jsx, import useState from react:
import { useState } from 'react'In the App function, create a hasClicker and setHasClicker variables with useState:
export default function App()
{
    const [ hasClicker, setHasClicker ] = useState(true)

    return <>
        <Clicker />
    </>
}
Now, create a <button> and, when the user clicks on it, invert the hasClicker.
Now would be a good time to try it on your own.
Let’s do it together.
Create a <button>:
export default function App()
{
    // ...

    return <>
        <button>Toggle clicker</button>
        <Clicker />
    </>
}

Create a toggleClickerClick function that will be called when the button is clicked and, in it, use the setHasClicker() function to send it the inverse of hasClicker:
export default function App()
{
    // ...

    const toggleClickerClick = () =>
    {
        setHasClicker(!hasClicker)
    }

    // ...
}
Send the function to the onClick attribute of the <button>:
export default function App()
{
    const [ hasClicker, setHasClicker ] = useState(true)

    const toggleClickerClick = () =>
    {
        setHasClicker(!hasClicker)
    }

    return <>
        <button onClick={ toggleClickerClick }>Toggle clicker</button>
        <Clicker />
    </>
}
Now, we want our component to react to that state.
First, let’s change the text in the button to write Show Clicker or Hide Clicker.
Remember that we can’t use if inside the JSX, but we can use the ternary condition between {}:
export default function App()
{
    // ...

    return <>
        <button onClick={ toggleClickerClick }>{ hasClicker ? 'Hide' : 'Show' } Clicker</button>
        <Clicker />
    </>
}
Now, the text changes, but we also want our Clicker to toggle.
Again, we can’t use an if, but a ternary condition is still a viable solution:
export default function App()
{
    // ...

    return <>
        <button onClick={ toggleClickerClick }>{ hasClicker ? 'Hide' : 'Show' } Clicker</button>
        { hasClicker ? <Clicker /> : null }
    </>
}
Although it might seem weird, we put a component inside the ternary condition result which is inside { … }.
Note that if the result is null, nothing is shown.
Our Clicker toggling is working, but instead of a ternary condition, we can also use the && trick:
export default function App()
{
    // ...

    return <>
        <button onClick={ toggleClickerClick }>{ hasClicker ? 'Hide' : 'Show' } Clicker</button>
        { hasClicker && <Clicker /> }
    </>
}
JavaScript, when handling && will first check the left part.
- If the left part is
true, it’ll then check the right part and return it. - If the left part is
false, it won’t even bother to check the right part.
We can now destroy and create the Clicker component at will.
Destroy the localStorage data
When the Clicker is being destroyed, we want to delete the localStorage data.
To do that, we are going to add a return to the useEffect with the [] dependencies (the one being called on the first render).
In the useEffect we left empty in Clicker, return a function:
export default function Clicker()
{
    // ...

    useEffect(() =>
    {
        return () =>
        {
            console.log('Disposing')
        }
    }, [])

    // ...
}
That’s the way of providing instructions that React should call when the component is being disposed of.
In this function, we can remove the data from localStorage with the removeItem() method:
export default function Clicker()
{
    // ...

    useEffect(() =>
    {
        return () =>
        {
            localStorage.removeItem('count')
        }
    }, [])

    // ...
}
Remove the Clicker by clicking on the <button> and check if the data has been emptied in localStorage.
Props 02:30:41
In this part, we are going to talk about what we call “props”. But first, let’s set things up.
Multiple Clickers
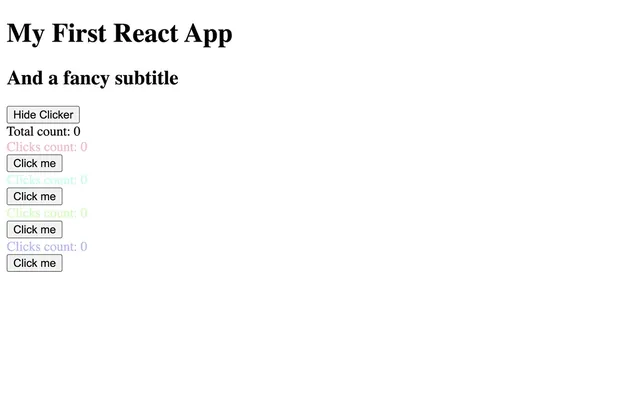
Create multiple Clickers:
export default function App()
{
    // ...

    return <>
        <button onClick={ toggleClickerClick }>{ hasClicker ? 'Hide' : 'Show' } Clicker</button>
        { hasClicker && <Clicker /> }
        { hasClicker && <Clicker /> }
        { hasClicker && <Clicker /> }
    </>
}

We simply duplicated the line, but we could have put all 3 clickers together using a fragment <></>:
export default function App()
{
    // ...

    return <>
        <button onClick={ toggleClickerClick }>{ hasClicker ? 'Hide' : 'Show' } Clicker</button>
        { hasClicker && <><Clicker /><Clicker /><Clicker /></> }
    </>
}
We can also add line breaks in order to make it more readable (which will get useful very soon):
export default function App()
{
    // ...

    return <>
        <button onClick={ toggleClickerClick }>{ hasClicker ? 'Hide' : 'Show' } Clicker</button>
        { hasClicker && <>
            <Clicker />
            <Clicker />
            <Clicker />
        </> }
    </>
}
It’s up to you to decide on the best way to write code, but since we are going to add some attributes to the Clickers, let’s keep them on multiple lines.
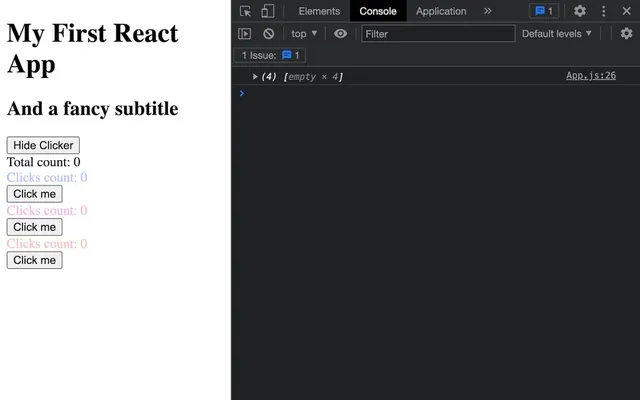
Things seem to work properly, but if you try to click on the buttons to increase the counts and then reload, you’ll see that the values aren’t correct:
The problem is with the localStorage because we are saving and updating all clickers into the same key named 'count'. We need a way to send a different key for each one of the Clicker.
To do that, we can use what we call in React “props”.
Props are properties of a component and can be set using attributes. You can use whatever attribute you want, as long as it’s not a reserved keyword.
Here, we are going to use the keyName attribute because key is a reserved keyword (that we will discover later).
Add a different keyName attribute to each Clicker and choose a different name for each one:
export default function App()
{
    // ...

    return <>
        <button onClick={ toggleClickerClick }>{ hasClicker ? 'Hide' : 'Show' } Clicker</button>
        { hasClicker && <>
            <Clicker keyName="countA" />
            <Clicker keyName="countB" />
            <Clicker keyName="countC" />
        </> }
    </>
}
Now, to retrieve that prop in the Clicker component we need to add an argument to the function:
export default function Clicker(props)
{
    console.log(props.keyName)

    // ...
}
props is an object that will contain properties named after the attributes sent to the component (in our case keyName).
Note that if you like to use dash-case for attributes like key-name you can retrieve it with props['key-name'], but it’s not recommended as we are going to discover now.
A faster way to retrieve the props is to destructure them directly in the function arguments:
export default function Clicker({ keyName })
{
    console.log(keyName)

    // ...
}
It’s very similar to the way we destructured the state array earlier, but for objects.
We can now use it as the localStorage key for getItem(), removeItem() and setItem() instead of 'count':
export default function Clicker({ keyName })
{
    const [ count, setCount ] = useState(parseInt(localStorage.getItem(keyName) ?? 0))

    useEffect(() =>
    {
        return () =>
        {
            localStorage.removeItem(keyName)
        }
    }, [])

    useEffect(() =>
    {
        localStorage.setItem(keyName, count)
    }, [ count ])

    // ...
}
Different text colors
Let’s practice props a bit more by setting a different color for each Clicker text.
If you feel like it, now would be a good opportunity to try to do it yourself.
Let’s do it together.
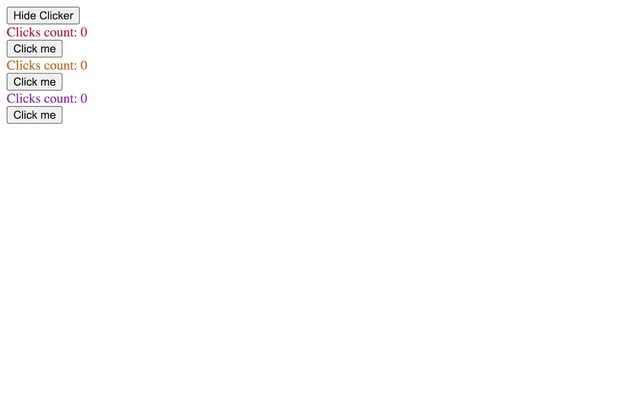
Send a color attribute to each Clicker:
export default function App()
{
    // ...

    return <>
        <button onClick={ toggleClickerClick }>{ hasClicker ? 'Hide' : 'Show' } Clicker</button>
        { hasClicker && <>
            <Clicker keyName="countA" color="crimson" />
            <Clicker keyName="countB" color="chocolate" />
            <Clicker keyName="countC" color="darkOrchid" />
        </> }
    </>
}
Retrieve the color prop in Clicker:
export default function Clicker({ keyName, color })
{
    // ...
}
Use it on the <div> with the style attribute and don’t forget that you need to send an object to it:
export default function Clicker({ keyName, color })
{
    // ...

    return <div>
        <div style={ { color: color } }>Clicks count: { count }</div>
        <button onClick={ buttonClick }>Click me</button>
    </div>
}
By the way, in JavaScript, when the property name is the same as the value, we don’t have to write both the key and the value:
<div style={ { color } }>Clicks count: { count }</div>Let’s go even further and send a random color.
To create a random color, in CSS, we can use hexadecimal or RGB format, but it’s even better to use HSL format.
HSL is composed of three values:
- Hue: An angle that ranges between
0degto360deg. At0deg, it’s red and at360degit’s red again, but it went through every possible color of the rainbow. We can actually go beyond360degand it’ll keep looping through all the colors. - Saturation: An amount of color saturation that goes from
0%to100%. When it’s0%there is no color and we get only gray. When it’s100%, it’s saturated and we get vivid colors. - Lightness: An amount of lightness that goes from
0%to100%. When it’s0%, it’s black. When it’s100%, it’s white. And when it’s50%, we get the non-altered color. As an example, a lightness of70%would make the color look more pastel-ish since we are adding white to it.
We are going to choose a fixed saturation of 100% and a fixed lightness of 70%, but have a random hue from 0deg to 360deg.
Because the hue is going to vary, we need to concatenate it.
One good way of doing concatenation is to use back quotes `` (or template literal) instead of the usual +.
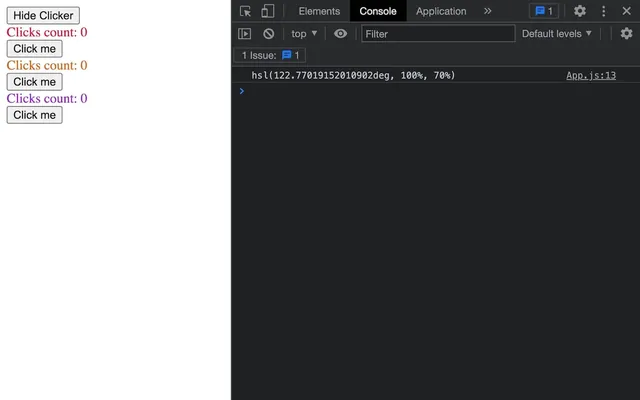
Try it anywhere in a log:
console.log(`hsl(${ Math.random() * 360 }deg, 100%, 70%)`)
Let's send this value to each Clicker color attribute:
export default function App()
{
    // ...

    return <>
        <button onClick={ toggleClickerClick }>{ hasClicker ? 'Hide' : 'Show' } Clicker</button>
        { hasClicker && <>
            <Clicker keyName="countA" color={ `hsl(${ Math.random() * 360 }deg, 100%, 70%)` } />
            <Clicker keyName="countB" color={ `hsl(${ Math.random() * 360 }deg, 100%, 70%)` } />
            <Clicker keyName="countC" color={ `hsl(${ Math.random() * 360 }deg, 100%, 70%)` } />
        </> }
    </>
}

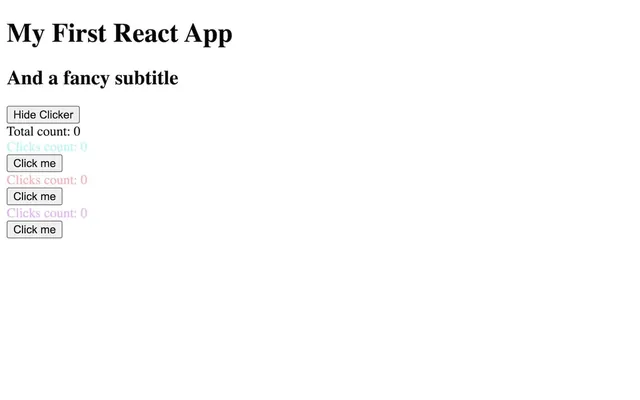
The children prop
There is a special prop named children.
Currently, our App is written like this:
<App />But we can write it like this:
<App></App>Doing so, lets us write more stuff inside of it:
<App>My First React App</App>And even more complex JSX with tags or other components:
<App>
    <h1>My First React App</h1>
    <h2>And a fancy subtitle</h2>
</App>
But doing that doesn’t seem to change anything in the end and we lose the content we put there.
It’s because we need to manually retrieve that content and display it wherever we want.
In App.jsx retrieve the children prop:
export default function App({ children })
{
    // ...
}
And display it in the return, before the rest:
export default function App({ children })
{
    // ...

    return <>
        { children }

        {/* ... */}
    </>
}

Moving data up 02:58:13
We have multiple Clickers with each one having its own count. We would like to have a global count.
When pressing any of the clickers buttons, we want that global count to increment.
We are going to display that value in the App because it’s above the Clickers. In a way, we want to move data up from the component (the Clicker) to its parent (the App).
In React, we talk about “Lifting State Up”.
Creating the state
First, in App, we need to create a count state with useState and initialise it to 0:
export default function App({ children })
{
    const [ hasClicker, setHasClicker ] = useState(true)
    const [ count, setCount ] = useState(0)

    // ...
}
Then, we can display it in the JSX right before the first <Clicker>:
export default function App({ children })
{
    // ...

    return <>
        {/* ... */}

        <div>Total count: { count }</div>

        {/* ... */}
    </>
}
Updating the state from the children
Currently, our value stays at 0, and clicking on the Clickers buttons won’t change it.
Getting the data straight from the children is a bad idea. That would make components dependent on each other and removing something would probably break something else.
Instead, in the App we are going to create a function whose purpose is to increment our count and provide that function to the Clickers.
Then, the Clicker will call this function when the user clicks on the button.
In App, create a increment function and update the state to add 1 to the count:
export default function App({ children })
{
    // ...

    const increment = () =>
    {
        setCount(count + 1)
    }

    // ...
}
Now send this increment function to the attributes of every Clicker:
{ hasClicker && <>
    <Clicker increment={ increment } keyName="countA" color={ `hsl(${ Math.random() * 360 }deg, 100%, 75%)` } />
    <Clicker increment={ increment } keyName="countB" color={ `hsl(${ Math.random() * 360 }deg, 100%, 75%)` } />
    <Clicker increment={ increment } keyName="countC" color={ `hsl(${ Math.random() * 360 }deg, 100%, 75%)` } />
</> }
Implement in the children
In Clicker, we can retrieve the new increment prop:
export default function Clicker({ increment, keyName, color })
{
    // ...
}
All we need to do now, is call increment() in the appropriate place. In our case, it’s in buttonClick function:
export default function Clicker({ increment, keyName, color })
{
    // ...

    const buttonClick = () =>
    {
        setCount(count + 1)
        increment()
    }

    // ...
}
And that’s it, we now have our global count that increments itself when we click on a Clicker button. Even removing Clickers won’t break our app.
This is the simplest version of global state management, but for more complex applications, there are other solutions like Zustand that we will use later in the chapter.
Loop 03:04:42
Currently, we created 3 Clickers.
We are going to spice things up and let the developer decide how many Clickers need to be added to the <App>.
In index.jsx, add clickersCount attribute to the <App> and set it to 4:
root.render(
    <App clickersCount={ 4 }>
        {/* ... */}
    </App>
)
Retrieve the clickersCount prop in the App:
export default function App({ clickersCount, children })
{
    // ...
}
Now, the question is, how can we create that many <Clicker>?
Unfortunately, as we saw earlier, we can’t do a for loop in the JSX. There are multiple alternatives and one of them implies using the map method.
map() will go through an array and call the function that we provide for each item in that array. It’ll then return whatever we put in the return of the function.
Let’s experiment a little right before the return.
Create a tempArray:
const tempArray = []
console.log(tempArray)
This array currently has no item inside. We want it to be clickersCount long.
We can write Array(clickersCount) instead of [].
const tempArray = Array(clickersCount)
console.log(tempArray)
We now have a 4 elements long array. Easy? Unfortunately, we can’t use map on it.
If we try, we get nothing in the console:
const tempArray = Array(clickersCount)
tempArray.map(() =>
{
    console.log('value')
})
To fix that, we can create a new array based on the values of that array.
And to get the values of the array (not the array itself but only what’s inside), we can use the spread operator:
const tempArray = [...Array(clickersCount)]
tempArray.map(() =>
{
    console.log('value')
})
Weirdly, the result array we get is filled with 4 undefined and we can loop on it (welcome to JavaScript).
And we can even access the value and the index by adding parameters to our function:
const tempArray = [...Array(clickersCount)]
tempArray.map((value, index) =>
{
    console.log(value, index)
})
Let’s transpose that in the JSX:
export default function App({ clickersCount, children })
{
    // ...

    return <>
        {/* ... */}

        { hasClicker && <>
            { [...Array(clickersCount)].map(() =>
                <Clicker
                    increment={ increment }
                    keyName="countA"
                    color={ `hsl(${ Math.random() * 360 }deg, 100%, 75%)` }
                />
            ) }
        </> }

    </>
}
But we made a small mistake here.
As you can see, the keyName attribute is the same for all Clickers again.
To fix that, we can use the index provided in the map function and do a concatenation:
export default function App({ clickersCount, children })
{
    // ...

    return <>
        {/* ... */}

        { hasClicker && <>
            { [...Array(clickersCount)].map((value, index) =>
                <Clicker
                    increment={ increment }
                    keyName={ `count${index}` }
                    color={ `hsl(${ Math.random() * 360 }deg, 100%, 75%)` }
                />
            ) }
        </> }

    </>
}
And now we’ve got our Clickers back. On top of that, we can now control how many of them we want with a simple attribute:
root.render(
    <App clickersCount={ 6 }>
        {/* ... */}
    </App>
)
Let’s put back 3 for now.
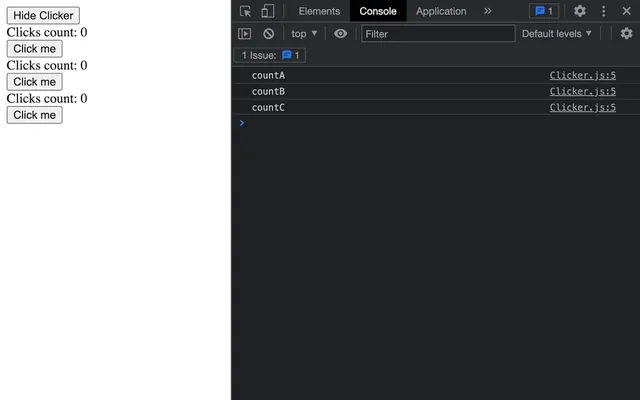
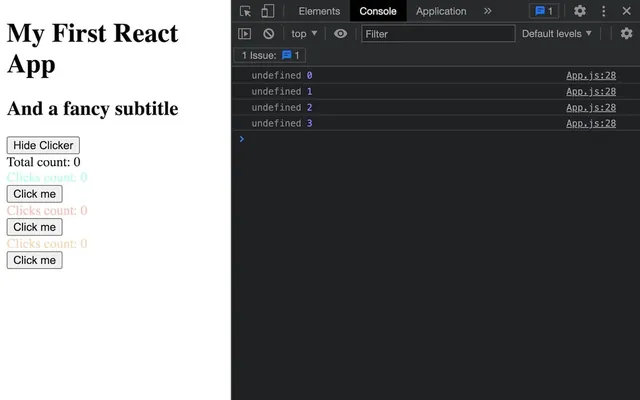
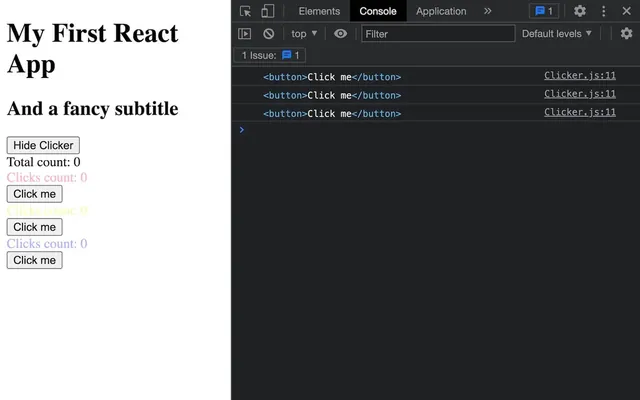
If you open up your console, you’ll notice another issue: React indicates we need to set a key prop on components that are being duplicated.
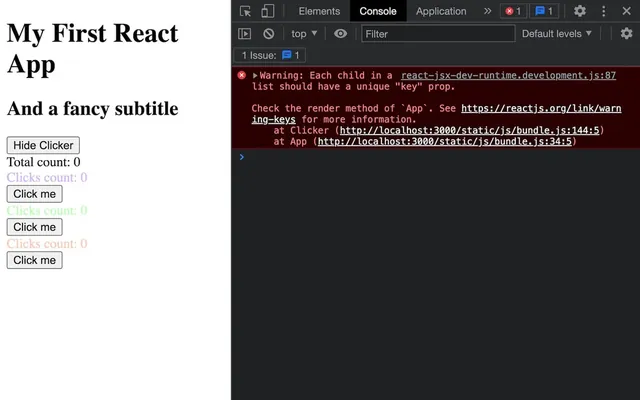
When looping like this, React needs us to send a unique key attribute for each element of the iteration. It will help React organise, re-use, and know what to re-render.
But it doesn’t really make sense here since we are just duplicating the <Clicker>
Later in the lesson, we are going to set a key that makes more sense, but for now, let’s use the index from the map parameters as the key:
export default function App({ clickersCount, children })
{
    // ...

    return <>
        {/* ... */}

        { hasClicker && <>
            { [...Array(clickersCount)].map((value, index) =>
                <Clicker
                    key={ index }
                    increment={ increment }
                    keyName={ `count${index}` }
                    color={ `hsl(${ Math.random() * 360 }deg, 100%, 75%)` }
                />
            ) }
        </> }

    </>
}
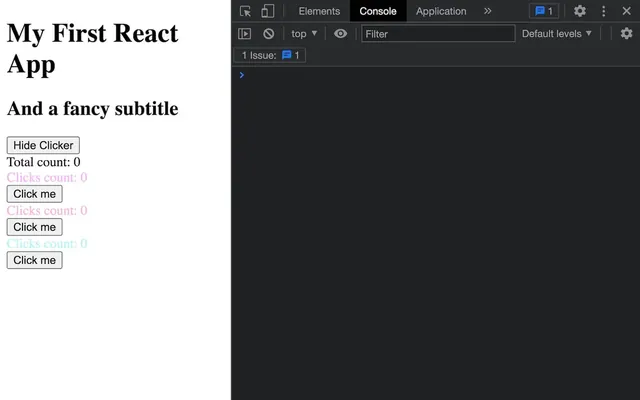
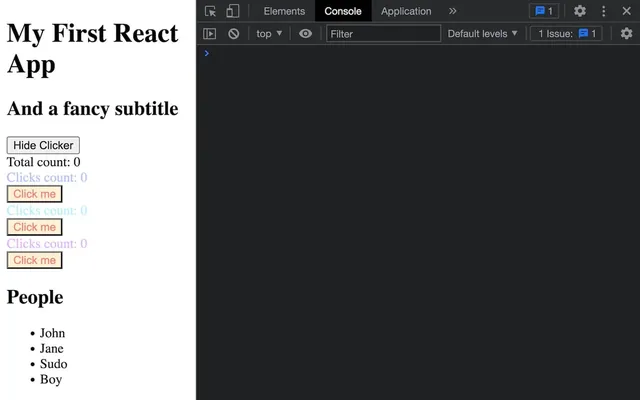
Voilà! The error is gone.
Saving values with useMemo 03:23:41
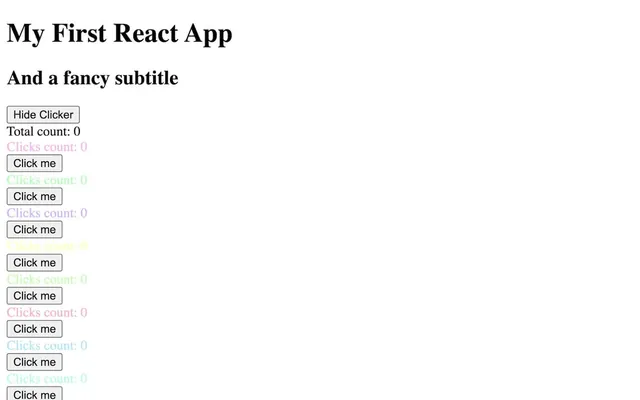
When clicking on the Clicker button, you might have noticed that the colors of all Clicker are changing:
This is the normal behaviour. Since one of the variables (count in our case) has changed, our App is being re-rendered.
But what if we want to keep the colors?
Solution 1
As a first solution, and without knowing React in depth, we could think of creating an array of colors before the class and we could then use it in the JSX. Let’s try that.
Create a colors array outside of the class with 3 random colors inside (since we have 3 Clickers):
const colors = [
    `hsl(${ Math.random() * 360 }deg, 100%, 75%)`,
    `hsl(${ Math.random() * 360 }deg, 100%, 75%)`,
    `hsl(${ Math.random() * 360 }deg, 100%, 75%)`
]

export default function App({ children })
{
    // ...
}
Then use it on the <Clicker>:
export default function App({ children })
{
    // ...

    return <>
        {/* ... */}

        { hasClicker && <>
            { [...Array(clickersCount)].map((value, index) =>
                <Clicker
                    key={ index }
                    increment={ increment }
                    keyName={ `count${index}` }
                    color={ colors[index] }
                />
            ) }
        </> }
    </>
}
And we are done! Well, not exactly.
Adding code outside the class is a good solution and sometimes, the simplest solutions are the best ones. But in our case, this can break easily.
First, what if we have two Apps?
In index.jsx, add a second <App> and don’t forget to add a fragment <></>:
root.render(
    <>
        <App clickersCount={ 3 }>
            <h1>My First React App</h1>
            <h2>And a fancy subtitle</h2>
        </App>
        <App clickersCount={ 3 }>
            <h1>My second React App</h1>
            <h2>It's just a copy</h2>
        </App>
    </>
)
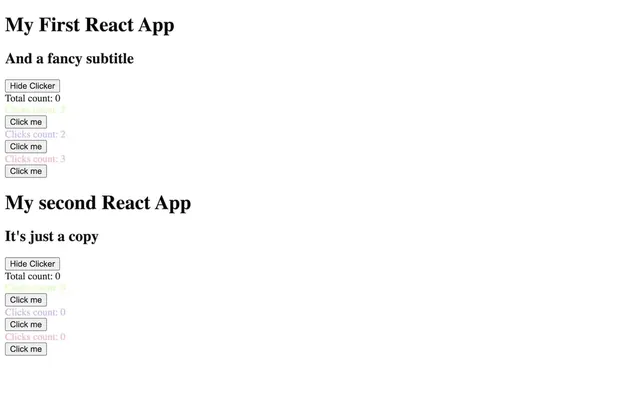
As you can see, the colors are the same. It’s a silly example since we should have only one <App>, but it could have happened in another context with different components.
Let’s get back to one <App>:
root.render(
    <App clickersCount={ 3 }>
        <h1>My First React App</h1>
        <h2>And a fancy subtitle</h2>
    </App>
)
The other problem is that we can decide how many Clickers we have from the App attributes.
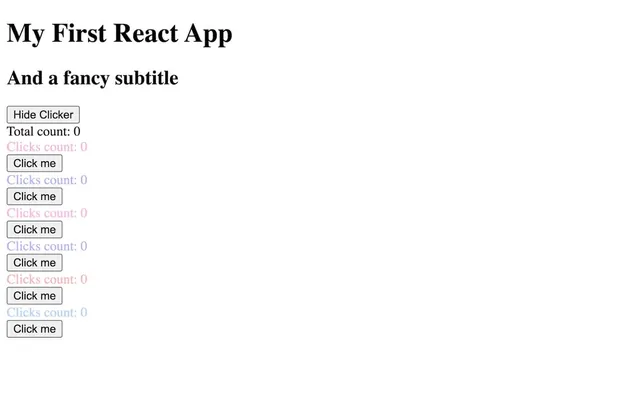
Set the clickersCount to 10:
root.render(
    <App clickersCount={ 10 }>
        <h1>My First React App</h1>
        <h2>And a fancy subtitle</h2>
    </App>
)
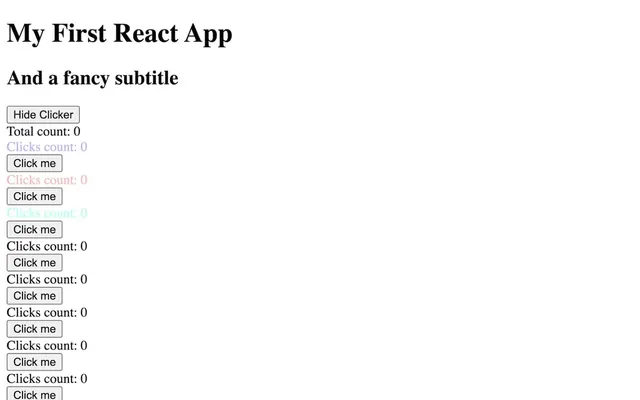
As you can see, only the first three Clickers are displayed in color since our colors array only contains 3 values.
Solution 2: With useMemo
Because we need to know the value of clickersCount before creating the colors array, we have no choice but to put it back inside the App function and fix the problem there:
export default function App({ clickersCount, children })
{
    // ...

    const colors = [
        `hsl(${ Math.random() * 360 }deg, 100%, 75%)`,
        `hsl(${ Math.random() * 360 }deg, 100%, 75%)`,
        `hsl(${ Math.random() * 360 }deg, 100%, 75%)`
    ]

    return <>
        {/* ... */}
    </>
}
First, let’s change our code so that the colors array contains as many values as in the clickersCount value.
Create an empty colors array and fill it using a for loop:
export default function App({ clickersCount, children })
{
    // ...

    const colors = []
    for(let i = 0; i < clickersCount; i++)
        colors.push(`hsl(${ Math.random() * 360 }deg, 100%, 75%)`)

    // ...
}
Now, all the Clickers have a color, but we didn’t fix the fact that all of them change when we click on any of the Clickers buttons because states are changing and the App function will be called again for re-rendering.
What we want to do, is to create that array and to keep it as it is even if the App is being re-rendered unless the clickersCount value changes.
And this is exactly what the useMemo hook does.
Import useMemo from react:
import { useMemo, useState } from 'react'useMemo needs a function as the first parameter and an array of dependencies as the second parameter (a bit like useEffect).
In the function we need to return the desired value (in our case the colors array). If useMemo is being called again (when the App is being re-rendered), but the values in the dependencies array haven’t changed, useMemo will return the previous array.
And if one of the dependency values has changed, then useMemo will call the function again.
In a way, useMemo works like a cache, and only a dependency value change can break it.
Call useMemo and pass it a function and an array:
export default function App({ clickersCount, children })
{
    // ...

    const colors = []
    for(let i = 0; i < clickersCount; i++)
        colors.push(`hsl(${ Math.random() * 360 }deg, 100%, 75%)`)

    useMemo(() =>
    {

    }, [])

    // ...
}
Now return the colors array in it and assign the result of useMemo to the colors variable:
export default function App({ clickersCount, children })
{
    // ...

    const colors = useMemo(() =>
    {
        const colors = []
        for(let i = 0; i < clickersCount; i++)
            colors.push(`hsl(${ Math.random() * 360 }deg, 100%, 75%)`)

        return colors
    }, [])

    // ...
}
We need to provide the dependencies. In our case, we want to update colors only if clickersCount changes:
export default function App({ clickersCount, children })
{
    // ...

    const colors = useMemo(() =>
    {
        // ...
    }, [ clickersCount ])

    // ...
}
If the clickersCount value changes, then useMemo will call the function again and we will always have the right amount of values in the colors array.
Now that we are done with useMemo and the colors, let’s get back to 3 <Clicker> by setting the clickersCount attribute to 3:

Note that useMemo is usually used to handle complex calculations and prevent that calculation from happening on each draw unless it’s really necessary (if a dependency variable has changed).
Still, we can use useMemo for simple calculations like we just did here.
References with the useRef hook 03:37:16
We’ve seen how to manipulate elements the React way, change the style, send props, etc.
But sometimes, we really need to get access to the DOM element itself or whatever native component we are dealing with.
There is no specific purpose in what we are going to do next, but the technique is going to be useful later in the course.
To get access to the actual element, we can use the useRef hook.
The idea is to create a reference first and then associate it with the targeted element.
In Clicker.jsx, import useRef from react:
import { useRef, useEffect, useState } from 'react'Then create a reference named buttonRef (we are ending the variable name with Ref, but this is optional):
export default function Clicker({ keyName, color })
{
    const [ count, setCount ] = useState(0)

    const buttonRef = useRef()
    console.log(buttonRef)

    // ...
}
By default, a reference is a simple object with a current property set to undefined.
Now, associate it with the <button> using the ref attribute:
export default function Clicker({ keyName, color })
{
    // ...

    return <div>
        <div style={ { color } }>Clicks count: { count }</div>
        <button ref={ buttonRef } onClick={ buttonClick }>Click me</button>
    </div>
}
What we are doing here might sound weird because we are assigning the buttonRef to the element instead of assigning the element to buttonRef. But this is how a React reference works and, in the end, the element will be available in the reference (more precisely in the current property of the reference).
We should now be able to access the <button> element by using buttonRef, but there is a catch.
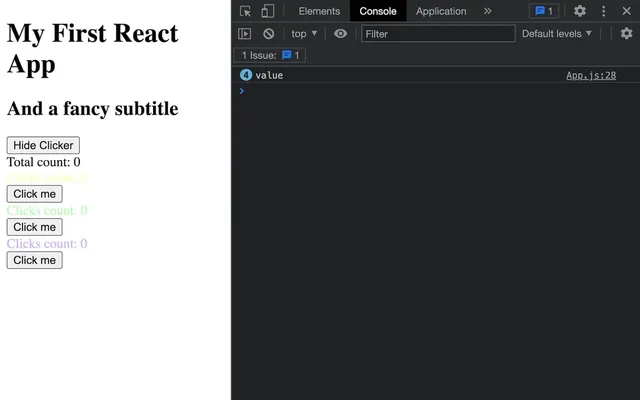
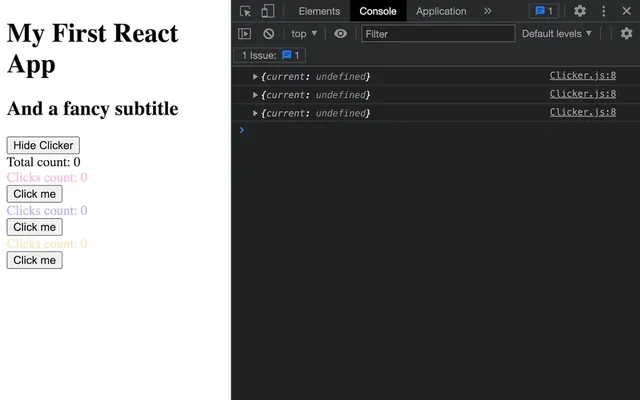
Reload and check the logs of buttonRef:
Weird. Weren’t we suppose to get a reference to the actual element or something like that? Well yes, but the log occurs at the beginning of the the first render of the component and the JSX hasn’t been rendered at this point.
But if you make any change that implies a re-render of the component, you’ll notice that the current property now contains the element:
Ok, it kind of makes sense, but what if we want to play with our reference on the first render?
To do that, we can use useEffect and set the dependencies array as empty. As we covered in the previous sections, setting the dependencies to an empty array will call the function only once on the first render, but it’ll actually do it after the JSX has been rendered.
And since we already have one in the component, we can test our buttonRef in it:
export default function Clicker({ keyName, color })
{
    // ...

    const buttonRef = useRef()

    useEffect(() =>
    {
        console.log(buttonRef)

        // ...
    }, [])

    // ...
}
Give it a reload if you want to make sure it’s working.
We can now access the native DOM Element and do anything we want with it, but don’t forget to use the current property and not the reference variable itself:
export default function Clicker({ keyName, color })
{
    // ...

    const buttonRef = useRef()

    useEffect(() =>
    {
        buttonRef.current.style.backgroundColor = 'papayawhip'
        buttonRef.current.style.color = 'salmon'

        // ...
    }, [])

    // ...
}

This example wasn’t very relevant, but it’ll make more sense and become very useful once we start using React Three Fiber.
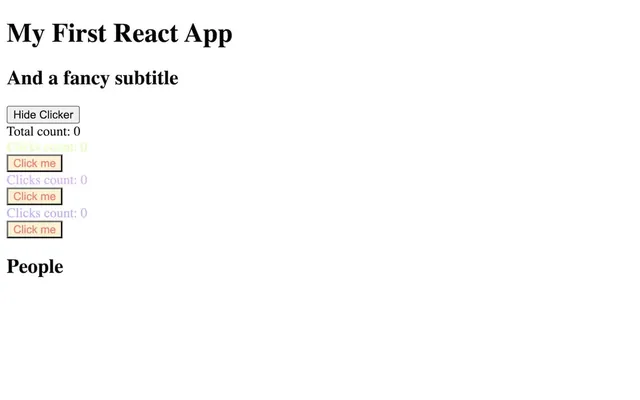
People component 03:46:51
We are almost done with React basics but we need to check a few more things.
We are going to create a People component that will display some random names that we get from an API.
In /src/, create a People.jsx file and the usual component function as default:
export default function People()
{
    return <div>
        <h2>People</h2>
    </div>
}
Import it in App.jsx and add it at the end of the JSX:
// ...
import People from './People.jsx'

export default function App({ children })
{
    // ...

    return <>
        {/* ... */}

        <People />

    </>
}
Display data using map
First, we are going to create a people array ourselves.
For now, it’s going to be a fixed array but later, the data will come from an API. For that reason, we are going to treat it like a value that can change and that should re-render the component when it does.
In People.jsx, import useState from react and create a people and setPeople state:
import { useState } from 'react'

export default function People()
{
    const [ people, setPeople ] = useState([])

    return <div>
        <h2>People</h2>
    </div>
}
For now, let’s fill that array with random values:
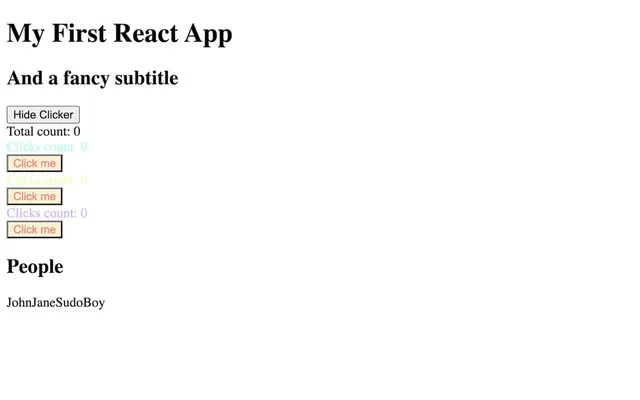
export default function People()
{
    const [ people, setPeople ] = useState([
        { name: 'John' },
        { name: 'Jane' },
        { name: 'Sudo' },
        { name: 'Boy' }
    ])

    return <div>
        <h2>People</h2>
    </div>
}
The question is, how do we loop in an array to display data in JSX.
Well, we already learned that in a previous section. We are going to use a map(), but this time, it’s not going to be on a weirdly generated array. This time, we are going to do it on the people array.
Now would be a good time to try to do it on your own. Display each person from that people array in an <li> and wrap those <li> in an <ul>.
If you are not comfortable with map, you can try to do it outside of the JSX first. Then, try to do it in the JSX and display those people's names.
Let’s do it together.
First, use the map in the JSX:
export default function People()
{
    // ...

    return <div>
        <h2>People</h2>

        { people.map(() => {}) }
    </div>
}
Now, add a person argument and return the person.name in the function:
export default function People()
{
    // ...

    return <div>
        <h2>People</h2>

        { people.map((person) => { return person.name }) }
    </div>
}
And since we are using an arrow function, we can simplify it:
export default function People()
{
    // ...

    return <div>
        <h2>People</h2>

        { people.map(person => person.name) }
    </div>
}
It’s working, but all the names are merged together.
Let’s create a <ul></ul> around the map and <li></li> in the return:
export default function People()
{
    // ...

    return <div>
        <h2>People</h2>

        <ul>
            { people.map(person => <li>{ person.name }</li>) }
        </ul>
    </div>
}

That’s where things get a bit messy in JSX. We have {} with more {} inside.
Feel free to add line breaks and indentations:
export default function People()
{
    // ...

    return <div>
        <h2>People</h2>

        <ul>
            { people.map(person =>
                <li>{ person.name }</li>
            ) }
        </ul>
    </div>
}
If you check the console, you’ll see that we are getting an error message from React:
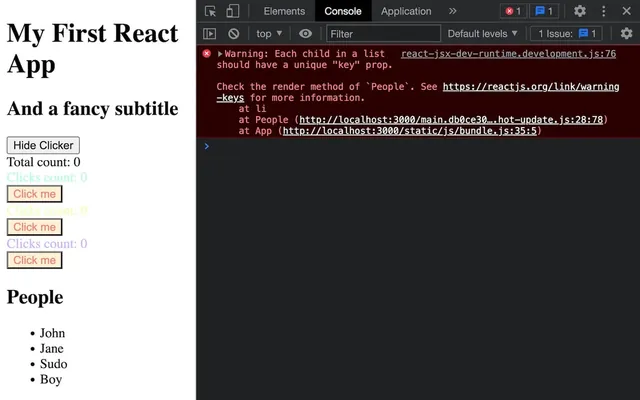
And if you remember from what we did earlier, we need to add a key attribute.
This time, we are not going to rely on an index. We are going to add an id property to each person in our people array. Don’t worry, it’s actually what we are going to get once we use the API.
Add an id to each person in the people array:
export default function People()
{
    const [ people, setPeople ] = useState([
        { id: 1, name: 'John' },
        { id: 2, name: 'Jane' },
        { id: 3, name: 'Sudo' },
        { id: 4, name: 'Boy' }
    ])

    // ...
}
And use it in the <li>:
<ul>
    { people.map(person =>
        <li key={ person.id }>{ person.name }</li>
    ) }
</ul>
Same result, but the error is gone.
Remember that we don’t do this just for the sake of getting rid of the error. React will now be able to do extra optimisations in very specific situations where elements are being destroyed, added or if their order is changing.
Fetch data from an API
Instead of that static array, we want the data to come from an API.
We are going to use the JSONPlaceholder API and more precisely, this endpoint: https://jsonplaceholder.typicode.com/users
To get data from a URL, we can use the fetch JavaScript API.
The question is, where should we put the call?
First, in People.jsx create a getPeople function:
export default function People()
{
    // ...

    const getPeople = () =>
    {

    }

    // ...
}
We don’t want to call this function every time the component is re-rendered. Instead, we want to call it on the first render only and we can do that with useEffect.
Import useEffect from react:
import { useEffect, useState } from 'react'Call it after getPeople and pass an empty array as the second argument so that it’s called only on the first render:
export default function People()
{
    // ...

    useEffect(() =>
    {

    }, [])

    // ...
}
And now we can call getPeople() in it:
export default function People()
{
    // ...

    const getPeople = () =>
    {
    }

    useEffect(() =>
    {
        getPeople()
    }, [])

    // ...
}
We could have put the instruction directly in the useEffect function, but you’ll see that having getPeople separated will become useful.
In the getPeople function, use the fetch API:
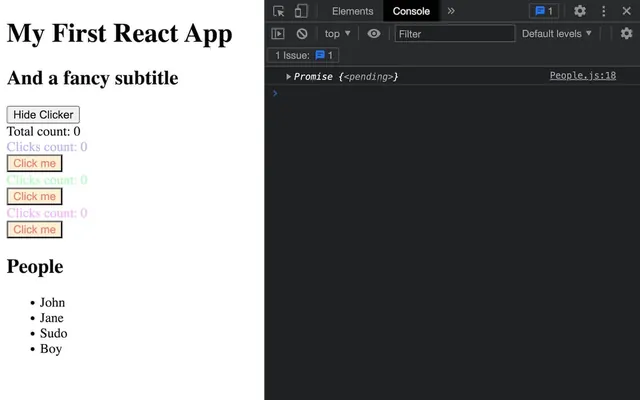
const getPeople = () =>
{
    const request = fetch('https://jsonplaceholder.typicode.com/users')

    console.log(request)
}
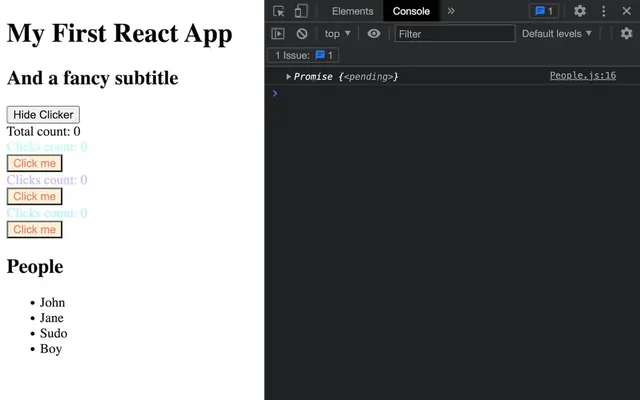
If you check the logs, you’ll see that we don’t get the API results in the request variable. Instead, we get a Promise.
If you are familiar with the fetch API and promises, you probably know where this is going. Still, we are going to explain everything so that beginners don’t get lost. Feel free to skip this part if you already know how to use fetch.
Note that the following content about fetch isn’t related to React, but I can’t help myself but to explain everything in detail.
Making a request and getting the result takes time. It can take a few milliseconds or a few seconds in the worst case scenario (bad Internet, bad server, a lot of data to transfer, etc.) and we don’t want our JavaScript to freeze while it’s doing it.
This is where the Promise comes to the rescue.
The Promise is immediately returned even though the request (or whatever happening) is still going on. We can then provide instructions to execute and those instructions will only be executed once the Promise is done with its task.
Promises can be used for a lot of things that imply waiting, but we are going to focus on the fetch.
To provide the instructions that should be executed next, we can use the then() method on the Promise and pass it a function:
const getPeople = () =>
{
    const request = fetch('https://jsonplaceholder.typicode.com/users')
    request.then((response) =>
    {
        console.log(response)
    })
}
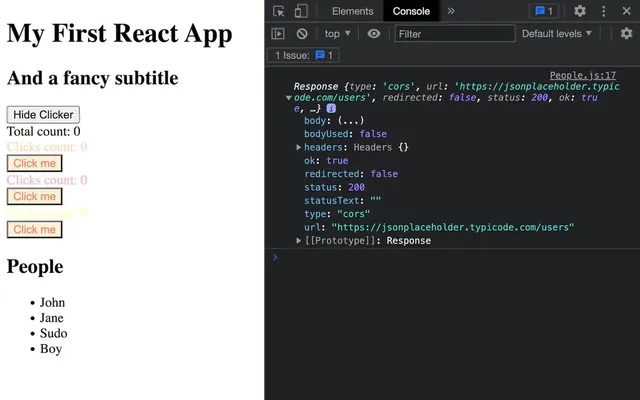
Our function will be called once the request is done, but unfortunately, this doesn’t look like the data we were expecting.
It’s because, the fetch API doesn’t know what to do with the data and we have to do it ourselves.
In our case, we want to parse the data as JSON and we can do it on the object we’ve just received with the json() method:
const getPeople = () =>
{
    const request = fetch('https://jsonplaceholder.typicode.com/users')
    request.then((response) =>
    {
        const parse = response.json()
        console.log(parse)
    })
}
Guess what? We’ve got a Promise again. This might sound weird because parsing data shouldn’t take time, but it’s actually quite a long process, especially if there is a lot of data. This is why it’s done on a different thread so that it doesn’t freeze our main script.
Again, we can use the then():
const getPeople = () =>
{
    const request = fetch('https://jsonplaceholder.typicode.com/users')
    request.then((response) =>
    {
        const parse = response.json()
        parse.then((result) =>
        {
            console.log(result)
        })
    })
}
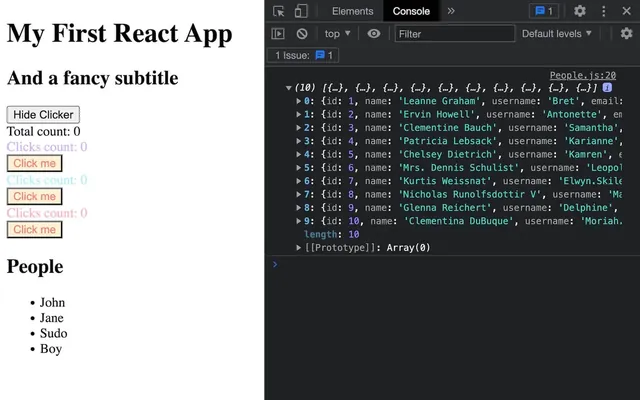
And now we get the real data as result.
Not a big fan of this silly code? Me neither. But good news, we can refactor it in a much shorter way.
First, we can return the response.json() promise and chain the two then() on the initial fetch():
const getPeople = () =>
{
    fetch('https://jsonplaceholder.typicode.com/users')
        .then((response) =>
        {
            return response.json()
        })
        .then((result) =>
        {
            console.log(result)
        })
}
Because there is only one instruction and one argument in our arrow functions, we can remove the (), {} and return:
const getPeople = () =>
{
    fetch('https://jsonplaceholder.typicode.com/users')
        .then(response => response.json())
        .then(result => console.log(result))
}
Already better, but we can even take it a step further.
We are going to tell the whole getPeople function to be asynchronous.
To do that, add async right before the arrow function:
const getPeople = async () =>
{
    // ...
}
By doing so, we can add the await keyword in front of every instruction that returns a Promise and save the results directly in variables:
const getPeople = async () =>
{
    const response = await fetch('https://jsonplaceholder.typicode.com/users')
    const result = await response.json()
    console.log(result)
}
The code will stop and wait for the Promise to be resolved before going to the next line, but everything outside the function will keep working without freezing the whole website.
We can now update our people state with setPeople and set the initial people array to []:
export default function People()
{
    const [ people, setPeople ] = useState([])

    const getPeople = async () =>
    {
        const response = await fetch('https://jsonplaceholder.typicode.com/users')
        const result = await response.json()
        setPeople(result)
    }

    // ...
}

And that’s it, we have a component that fetches data from an API and our application reacts to the input data and displays the information when it’s ready.
If you want to go a little further in order to practice, try to add a “loading” message while the data is being fetched.
Performances and Virtual DOM 04:17:20
One concern you might have regarding everything we have covered so far, is performance. All those features and mechanics seem like a lot of work for our computers, right?
Well, yes and no. When data changes, the component is being re-rendered and if you are using function components (like we did), you can see that everything happening in the function seems to be called again. But that doesn’t mean that the whole component is going to be re-rendered and especially not what’s visible to the user. In fact, only the part that has changed is going to be re-rendered.
To do that, React is using what we call a Virtual DOM. The Virtual DOM is a structural representation of your application. It’s not displayed on screen and its purpose is to be compared to its previous state when data changes. If some parts of it did change, then the real DOM (the one we see) corresponding to those parts will be re-rendered.
Still, those instructions in the component will be called, right? Yes, but React provides a bunch of tools to optimise this part. Let’s say you are doing heavy instructions on a huge array and it takes a few milliseconds to do it. Let’s also say that you have a state that changes a lot. Then our component will be re-rendered a lot and our heavy instructions will be done every time.
In this case, we can use one of the many tools provided by React and we have already used them before. As an example, we can set the value in a useState so that it’s only calculated on the first render. And if those instructions need to be done again in case some parameters change, then we can use useMemo instead and specify which variables should trigger the re-calculation in the dependencies array.
This is just an example and we are going to put that into practice in the next lessons.
Also note that, it’s good practice to keep an eye open on potential performance issues, but don’t worry too much about having your components re-rendered. Unless you are doing crazy calculations, your computer can handle a few instructions here and there.
Going further 04:21:11
That’s all for the React basics. We’ve actually learned a bit more than what we needed for the rest of the chapter, but I just wanted to make sure that you have enough knowledge to start your React journey on a solid footing.
There is a lot more to learn about React, like global states, server-side rendering, many other hooks, etc. and you can find a lot of learning resources on the following two pages from the official website:
- https://react.dev/learn
- https://reactjs.org/community/courses.html (old documentation but with good resources)
Now that we know React, it’s time to learn how to create Three.js experiences with React Three Fiber. I have to warn you, it’s a journey full of wonders that you are about to embark on.